8.28.2013

mPerks rewards {baby}

All you mommas of babies out there....did you know that Meijer now offers rewards on baby items purchased as part of their mPerks program?! 
Photo: The new mPerks Baby Rewards will make you smile so big that people might want to pinch your cheeks.  http://bit.ly/mPerksBaby 

How it works:

1}  Sign up for the mPerks baby rewards program here or simply login if you are already an mPerks member. 
2}  Enter your mPerks number and PIN at checkout and your baby rewards progress will be updated automatically.  There's even a handy baby rewards meter to help you track your progress.  
3}  Earn a $10 off reward for every $100 you spend on qualifying baby items.  Once you've earned a reward, you can clip the reward offer or you can wait and combine your credits for bigger savings!

Don't forget to check out the baby coupons available to clip while you are browsing the mPerks site and happy saving!
 

8.26.2013

{family dinner} manicotti...

Little Bit has loved getting into the kitchen more these days.  Our family cooking nights have been perfect for this!  She especially loves when cracking eggs are involved!  ;) 

I also love her having a hand in making the meals because it helps her know what goes into the dish and hopefully gets her to try some new things! 

We are big pasta lovers in this house, so manicotti was a perfect dish to try and create together!  Sometimes stuffing pasta might turn people off because it seems time consuming, but I thought it was fun and fairly easy to put it all together.

 Little Bit was a big help with measuring and pouring ingredients!

To stuff the shells I put my filling into a Ziploc bag, squeezed it down into one of the corners and then snipped off the corner tip to create a piping bag.  Then it was super easy to fill each shell!

Baked Manicotti

Ingredients:
manicotti noodles
16 oz. ricotta cheese
8 oz. shredded mozzarella cheese, plus
3/4 cup grated parmesan cheese, plus
1 egg
1 tsp fresh chopped parsley
1 Tbsp fresh chopped basil
salt & pepper to taste
16 oz. pasta sauce

Directions:
Preheat oven to 350 degrees.  Grease a 9x13 baking dish and set aside.  Boil your manicotti noodles for about 4-6 minutes, you don't want to over cook them because they will cook more in the oven.  Drain noodles and let them cool enough for you to handle them.

Combine cheeses, herbs and egg in a mixing bowl.  Add salt and pepper to taste. Transfer cheese mixture into Ziploc bag and snip one corner. 

Spoon 1 cup pasta sauce in the bottom of the baking dish.  Begin filling your shells with cheese mixture and place them in the prepared baking dish.  Spoon remaining sauce over top of shells and sprinkle with additional mozzarella and parmesan cheese.  Bake for 30-35 minutes until bubbly and cheese is melted. 

Enjoy!

This meal got rave reviews from my smiley girl!

8.19.2013

Menu Plan Monday


Monday ~grilled burgers & brats, sauteed zucchini, chips
Tuesday ~ tilapia sticks, mac & cheese, fruit
Wednesday ~ cinnamon roll french toast bake, bacon, fruit
Thursday ~ honey nut chicken tenders, loaded baked potatoes, salad
Friday ~ BBQ, sweet potato fries, corn on the cob

Linking up with Org Junkie...check them out for more recipes.

8.16.2013

Off to {school}

Hooray!  We survived the first day of school!  My little bit headed off to Kindergarten on Wednesday.  It was a very emotional day for me, but I kept myself busy and made it through!  I am so proud of how brave and energetic she is about school.  I hope it stays that way for a long time!

I made a 1st day sign using some black cardstock and a white crayon to get the chalkboard effect. 

She was so excited to get on the bus I almost didn't get a hug goodbye!

One thing that helped prepare her was getting to meet her teacher a couple days before school started.  We were able to attend an open house at her school, take her supplies and meet the teacher.  She was able to explore her classroom and look around the school to see the rooms she would be going to...and we even made a quick stop on the playground!

I put together this little gift to give to her teacher that night.  I took a Ball jar and filled it with pencils, pens, sharpies and dry erase markers.  Then I attached a jar shaped tag with the teachers name on one side and the saying {Can't wait to have a "BALL" with you this year in class!}  I had seen the idea here and just did my own thing with it. 

For more great back to school info check out Springfield Mom's resources here.  {My idea is even featured there!}

8.13.2013

{school} mantel

Little Bit starts school tomorrow!  She can't wait!  I'm excited for her but sad to lose my daily companion.  ;)  She got to meet her teacher last night, see her classroom and some of her classmates.  We even got to walk around and explore the different areas of the school she will be using.  

So to celebrate I thought it would be fun to do a school themed mantel. Of course she woke up and said, "why is my beach ball up there".  "Did you use my crayons?" and "Wait a minute, that's my bus!"  But she agreed it was cute and we could leave everything for a few days! 

 
I just worked with what I had and think the end result turned out pretty darn cute!  

It started with the globe beach ball.  I saw it lying on the floor in the living room and I thought hey, wonder what that would look like sitting on the candle holder.  Then I found a pic I had taken of Little Bit from Kindergarten night a few months ago.  I also used a small jar and filled it with brand new crayons!
 

I just made the banner using some red cardstock and cut little flags out.  I hand wrote the letters and attached them to twine with paperclips!  I knew Little Bit had a toy bus, so I added that to my little wooden crate display.  I already had the quote block and love the saying...and the chevron along the edges! 


I finished off the mantel with some buttons in a jar and my favorite....scrabble letters!  I just put ABCDEFG on one of the little holders and there you have it.  I am loving how it turned out!

Menu Plan Monday

Monday ~ breaded zucchini, pasta, salad
Tuesday ~ chicken tacos, refried black beans, rice
Wednesday ~ PIZZA {Little Bit's fav to celebrate first day of Knd!}
Thursday ~  hobo meatball stew, bread
Friday ~ parmesan tilapia, green beans, baked potatoes

Linking up with Org Junkie...check them out for more recipes.

8.07.2013

i'm an AUNT!

YAY!!!  I have a niece...and she is the cutest thing ever.  Today she is 3 weeks old.  Little Bit and I were chomping at the bit to go visit her.  We both got lots of snuggle time with Little Peanut!  ;)

Isn't she just the sweetest?!!!  This is Little Peanut not long after she was born. 

Little Bit couldn't wait to hold her cousin!  She sure did a great job snuggling, feeding and loving on her!

I thought this was just too precious....gentle kisses!

Look at that bow!  Auntie Mandy had to supply her with some bows.  My sister isn't too excited about them but I think she just looks even more adorable!  ;) 

So proud of my sis for the wonderful little girl she has made.  Can't wait til the next time I get some more Little Peanut snuggles! 

8.05.2013

{FREE} peanut butter!

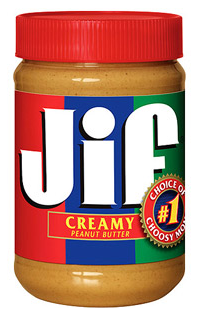
Don't miss the Meijer mPerks freebie for this week....free Jif creamy or extra crunchy peanut butter!
Just log into your mPerks account, enter the offer code FREEJIF, then clip your coupon for your free peanut butter.  

The offer is valid from today, Aug 5 through Aug. 8, 2013.

Menu Plan Monday

Monday ~ grilled hamburgers, mac & cheese, pickles
Tuesday ~ mushroom & pesto pasta, salad, bread
Wednesday ~ pizza, salad, fruit
Thursday ~ coconut curry soup, paninis, fruit
Friday ~ hobo meatball stew, bread

Linking up with Org Junkie...check them out for more recipes.

8.01.2013

{simple} thank you

I like to have cards on hand for when I need them in a pinch.  With teaching this past year I found I needed quite a few thank you cards.  This was one of my quick and easy cards I mass produced to have a supply ready for when I needed them.  Even though there were so simple I think they look pretty cute! 


All you need to recreate this for yourself are some card bases {I use 8.5x11 cardstock cut in half, then fold each section in half...getting 2 cards from 1 piece of cardstock}, patterned paper, square punch or paper trimmer, stamp, marker, and rhinestones if you so choose!

The card is pretty self explanatory but here are the steps I used...

I started by selecting a group of paper that coordinated with each other.  I knew I wanted to use a square punch, so I visually divided the card into 6 sections.  I then punched 5 squares and adhered them to the card front.  In my 6th empty space, I used my marker to draw a faux stitched line in the shape of a square.  Then I stamped my sentiment inside this square.  I added a rhinestone in the center of the "o" for some extra pizazz! 

I love using Stampin' Up stampin' write markers.  They have a brush tip on end and a fine tip on the other.  I used the brush tip to ink up my stamp and used the fine tip for the faux stitching!  Gotta love a product that preforms multiple tasks!  ;)