Showing posts with label Decor. Show all posts

8.05.2018

Back to school organization...

We recently redid Little Bits room and made it more grown up!  She is going into 5th grade this year and I can't believe it!  Where does the time go?!  Well, remember the homework area from this post?  She's quite outgrown the little table, so we moved it out and moved the whiteboard into her room.  


She now has a place to keep track of her weekly schedule, homework, bus times, etc.  She really loves having her own space to display postcards and artwork.  The whiteboard is also great for working out math problems, practicing writing, etc.  


She has loved keeping track of her weekly schedule this summer on a dry erase calendar I made using an Erin Condren "Oh What a Week" tear off sheet.  She can write down what we've got going each day, so she knows what to plan for.  She also will be able to keep track of what she has each day once school starts. 


We also created a shelf in my office with all kinds of writing materials and a clipboard.  She loves to grab the clipboard and a pen or pencil to work on her homework.  She can sit on the couch, floor, dining room table or in her underbed fort in her room! 

I love that as Little Bit gets older we can adapt our homework and organization system to what works best for her.  What are you doing to get ready for back to school at your house?

7.30.2014

Homework ready!

Defining an area in your home for school papers and homework was essential for getting Little Bit ready for starting school last year...and again this year.  Not that she had that much homework in Kindergarten, but it was nice having a designated place for all the papers coming in and out.  I posted about my back to school organizing where I used an existing dry erase board and turned it into a school information board.  A few times Little Bit brought home an assignment that didn't have to be turned in right away.  So we would work on it, then hang it on the board with a magnetic clip.  When it came time to turn it in we knew exactly where it was.  


This year Little Bit will be starting first grade.  I am sure she will be bringing home more school work than last year.  She has a small table and chair right beside our school info board.  It is the perfect spot for her to be creative and complete school work.  We have it all set up with jars of pencils, markers and crayons!  We even added a little wall art collage to help personalize it!  She loves that is is "her space" and is already wanting me to give her "homework" that she can do.  {Hello Pinterest and first grade worksheets!}  She is definitely ready to get this school year started!

2.05.2014

my little artist...

Last month Little Bit went to an arty party for her bestie's birthday.  This was such a fun experience!  I wanted to be a kid again and join in on the fun! 

Here is Little Bit with the birthday girl.  Behind them is a fun chalk wall that the kids could draw on throughout the party.

Each child at the party got to paint a frame {which was later filled with a group picture} and a canvas.  I wasn't sure what Little Bit would fill the canvas up with but I just let her have at it.  I was SO impressed with her creativity.  They started out with black, white, yellow, red and blue paint.  She loved mixing colors to make new ones for her artwork. 

Here is her finished product! 

She loved the process so much that we stopped on the way home to get a couple canvases so she could create more masterpieces!  

She got to work right away on a butterfly and flower.  This was such a fun experience for her.  I enjoyed watching her excitement throughout the process! 

They turned out BEAUTIFULLY!...


So we made an art collage on some blank wall space in her room.  LOVE!!!

1.29.2014

{button} thumbtacks

I am always looking for a new crafty project and love to repurpose things around the house.  And it makes me more excited to find a purpose for something when there is an owl involved! 

I picked up this owl corkboard in the Target One Spot section a year or so ago.  It was hanging in Little Bit's room with all her Disney pins on it until she got so many pins we had to get a new board!  So I was left with this cute little guy that was begging for a new home!  ;)  I had the perfect wall in my laundry room that needed some embellishing. 

I wanted to dress him up with some cute thumbtacks.  So I gathered my supplies...buttons, flat head thumbtacks, and glue dots.


I picked out a few buttons that matched the laundry room color scheme, placed a glue dot on the flat head thumbtack and attached the button.  It was really that simple!


 Here he is adding that perfect touch of cuteness to my laundry room!

11.22.2013

wake up your walls {Meijer gift card giveaway!}

The holidays are right around the corner and what perfect time to reflect on those who mean the most.  With Meijer's HP 1 hour and next day photo services, you can create wall decor and gifts that share photos of your most cherished memories.  You can create photo books, holiday cards, photo canvases, mounted photos and much more.

Thanks to Meijer and HP, I was able to try out these services and share some of the products I created with you! 


And let me tell you...it was super easy!  I went into the store, used one of the computer stations and my USB drive loaded with my pictures.  I just selected what format I wanted, size and picture...that's it!  They are ready in an hour or next day, depending on what format you choose.


I chose to create 2 mounted photos, a 5"x7" and an 8"x10".  This format comes with a stand, so it can be displayed either table top or hung on the wall.  These are very reasonably priced as well and would make awesome gifts!!!  Plus they are ready in about an hour.


I also created an 11"x14" wrapped photo canvas.  These come in a variety of sizes from 8"x8" up to 20"x24".  These are usually ready the next day.  I love the quality and I just used a simple picture {of one cute girl!} from my personal camera!  I just have it propped on a shelf, but you could also hang it on the wall. 


These would make great additions to a photo wall collage as well!

Now....how would you like the chance to win a $50 Meijer gift card to create some wonderful wall decor or photo gifts of your own?!  I have 3 of them to giveaway...so get entering!!!  Just leave a comment letting me know which product you would like to create.  I will draw a winner on Wednesday, November 27th...you will have until 2pm that day to enter! 

Better yet...here are some Meijer coupons to make your photo purchases an even better deal!

9.06.2013

back to school {organizing}

OMG...school has been in session for 3.5 weeks!  Little Bit is really enjoying it.  She loves riding the bus, eating breakfast at school, her teacher and making new friends!  

With school starting I knew there would be lots of papers to keep track of...bus schedule, specials schedule, word wall words, etc.  I wanted somewhere to keep it all that would be organized and cute at the same time!

So....I was racking my brain as to what I could make, where it would go and so forth.  Then I was sitting in my craft room and looked up from my computer.  I was like duh...repurpose the white board!  It's dry erase and magnetic...perfect.  Right now it was just a random hodgepodge of stuff and a bit of a mess.  Little Bit's desk was a bit of mess as well {it got a good cleaning too}!

I began be removing everything and laying out what I wanted to be displayed.  I chose a handwriting chart, specials schedule and word wall chart and clipped them onto twine that was already strung across the board.

I added a little banner spelling {school} across the top and mounted her bus schedule on some cute paper to help it stand out on the white.  I had some cute thought bubble post it notes that I stuck on the board for jotting quick notes and added a couple photos of Little Bit's first day of school!
 
At the bottom I straightened up her magnet letters and numbers and added 2 magnetic clips to hold artwork that we can change out.  I also love that I can write bible verses we are working on memorizing.

I love how it turned out!  Now my fridge isn't overflowing with papers and Little Bit knows right where to look when she wonders what special class she has each day...{she pretty much has them down now but I need help remembering}!   

8.13.2013

{school} mantel

Little Bit starts school tomorrow!  She can't wait!  I'm excited for her but sad to lose my daily companion.  ;)  She got to meet her teacher last night, see her classroom and some of her classmates.  We even got to walk around and explore the different areas of the school she will be using.  

So to celebrate I thought it would be fun to do a school themed mantel. Of course she woke up and said, "why is my beach ball up there".  "Did you use my crayons?" and "Wait a minute, that's my bus!"  But she agreed it was cute and we could leave everything for a few days! 

 
I just worked with what I had and think the end result turned out pretty darn cute!  

It started with the globe beach ball.  I saw it lying on the floor in the living room and I thought hey, wonder what that would look like sitting on the candle holder.  Then I found a pic I had taken of Little Bit from Kindergarten night a few months ago.  I also used a small jar and filled it with brand new crayons!
 

I just made the banner using some red cardstock and cut little flags out.  I hand wrote the letters and attached them to twine with paperclips!  I knew Little Bit had a toy bus, so I added that to my little wooden crate display.  I already had the quote block and love the saying...and the chevron along the edges! 


I finished off the mantel with some buttons in a jar and my favorite....scrabble letters!  I just put ABCDEFG on one of the little holders and there you have it.  I am loving how it turned out!

7.06.2013

{WASH}i letters

I spend more time in the laundry room than I like to...who doesn't, really?!  So I wanted it to be cute and fun to be in!  

My main decor focus was on the large wall above my counter.  We painted the walls a nice yellow which I new would go with some of the decor I had made for our previous laundry room.  I started off with the fabric banner and hung it up.  Then set the wash, dry, fold, repeat art on the counter. 


I knew I wanted a word on the wall.  Once I decided on the word WASH I picked up some paper mache letters at Joann fabrics and covered them with washi tape!  I used the same technique I did on my M in my craft room.


I really love how they turned out and the pop of color it adds to the space!


I also found this cute bible verse printable and hung it on a small wall above my iron! 


Have you {washied} anything lately?  ;)

5.07.2013

a fun new shop and {art print giveaway}!

My friend Kendahl from Beautifully Esoteric Life has just launched an Etsy shop!!!  She has designed some uber cute nursery/kids room prints that you will want to hurry over and check out!  I super love this adorable elephant print.  It would be perfect for my sister, who loves elephants and is having a baby in July!  There are several other cute animals to choose from, along with some fun family prints.  

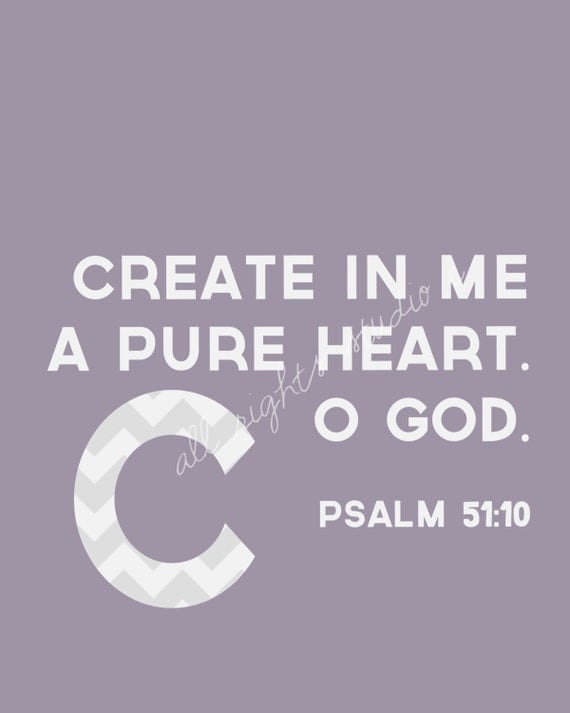
Kendahl has also designed alphabet bible verse prints!  Each letter is highlighted with a cute chevron print and a bible verse beginning with that letter.  What I love about these is that while they are geared towards nursery and kids room decor, they would be perfect for other rooms of your home too!  

ABC Chevron Alphabet Bible Verse Nursery Print "A" 
I just love this verse.  I could totally see it hanging in the living or family room!

ABC Chevron Alphabet Bible Verse Nursery Print "C" 
Or what about this one for the laundry room...where you are making everything pure and clean!  ;)

ABC Chevron Alphabet Bible Verse Nursery Print "L" 
Also love this one for the master bedroom...or anywhere really!  They are just too cute and too perfect for every room in your house.

Kendahal just designed these prints that would be perfect for a last minute Mother's Day gift!  And at just $5 for the download you can't go wrong.  Just print at your local Walgreens, Target or even your own home computer!
 

Now...how would you like to win one of these prints for yourself?!  Just leave a comment on my blog telling me which one you would choose.  You have until this Friday to enter. 

Oh but there is more...to celebrate her shop launch, Kendahl wants everyone to enjoy 10% off your print purchases.  Just enter LAUNCH10OFF at checkout!

5.03.2013

house number {planter}

I have been wanting to get some spring decor up on the porch for several weeks now and this weekend I finally got around to it!  I got out a tiered plant stand that I had sitting in the garage and looked for things to fill it up.  We also had several clay pots waiting for some attention.  I had seen this pot with vinyl numbers on it on Pinterest and knew I wanted to do something similar.  

Well I didn't have any black vinyl on hand so I improvised! 

I simply cut the letters out of cardstock, using my Circut and the Cuttin' Up font cartridge.  I then used this as a stencil.

I placed it on the pot where I wanted it, traced around the template with a black Sharpie and then carefully shaded in the space.

Then a quick trip to Menards for a few plants and it was good to go!  I just LOVE how it turned out!

Here is the whole decorated porch entry!

Linking up with...

 
Skip To My Lou

3.21.2013

Easter {decor}!

After leaving my Valentines decor up for the whole month of February, I decided the first week of March it should come down!  Plus I was in the mood to decorate for Easter.  I had seen several neat ideas on Pinterest that I wanted to create for my own decor.   

First up was this peep bunny art that I had seen last year and thought would be so cute to make.  So I found a template for the bunnies here.  The three bunnies were just perfect for our family.  I just had to shrink one of the bunnies to make it smaller to represent Little Bit!  Then I cut them out, glued them on light green paper and added accessories! 


The hubs got a cute little yellow bow tie, Little Bit got a pink hair bow, and I got a blue necklace!   LOVE it!

Next up I created a chocolate paper bunny.  I had seen this painted bunny piece on Pinterest that inspired my idea.  I didn't want to paint, so I brought out the paper instead! 


First I went to my favorite place...google images...to search for an outline of a bunny.  I thought this one was perfect!  {Sorry I don't have a link, I can't remember where I found it!}  I printed it out, cut out the bunny and then traced onto brown paper.  

Once I cut out the brown bunny, I adhered it to a piece of yellow patterned paper and put in in a frame.

It has a home on our mantel with some cute yellow ceramic rainboots I found at Gordmans!

My last piece I'm showing is so simple to create.  I saw some jars on Pinterest where they put a chocolate bunny in with some edible grass and little candy eggs.  I thought they were SUPER CUTE but I wanted to make sure mine would last and not attract bugs or anything, cause I don't have lids for all my jars. ;)  So I went with some Easter grass from the Dollar Tree and some colored eggs {1 or 2 years old from Michaels I think}.

Have you been inspired to create any Easter decor this year?!


Skip To My Lou


10.24.2012

costume parade...

I wanted to add something to my entry way mirror to "fall it up" a bit!  So I got out pics of Little Bit in her costumes over the years and hung them on some twine using mini clothespins. 

 
I added some leaves in between the pics and I just love how it turned out!!!

age 1...giraffe, age 2...pirate...


age 3...Jessie the yodeling cowgirl, age 4...owl!

coming soon...age 5...beautiful butterfly! ;)